what to use for upload volume size for duplicati
This commodity volition guide you on installing and configuring your nightly Duplicati fill-in addon for your Linux-based server with Hostwinds. The steps are the same regardless of the distribution. Later on completing this setup, the backup volition be scheduled to fill-in every night at a fourth dimension of your choosing. Yous tin can as well choose other scheduling options for your backups, which are covered in this article.
Getting Started
When the Duplicati Nightly Backup service is ordered and created, it'll generate a ticket in your client account. Once you receive this ticket, please continue to soft reboot the server. This will prompt the Duplicati installation to be pushed to the server and started. Staff members will then begin the configuration of your backups service.
Nosotros recommended allowing 10 -xv minutes from the receipt of the ticket until attempting to log in to ensure that the Duplicati installation has had time to complete. Once you've accessed the setup area, you'll see the screen shown in the epitome beneath:
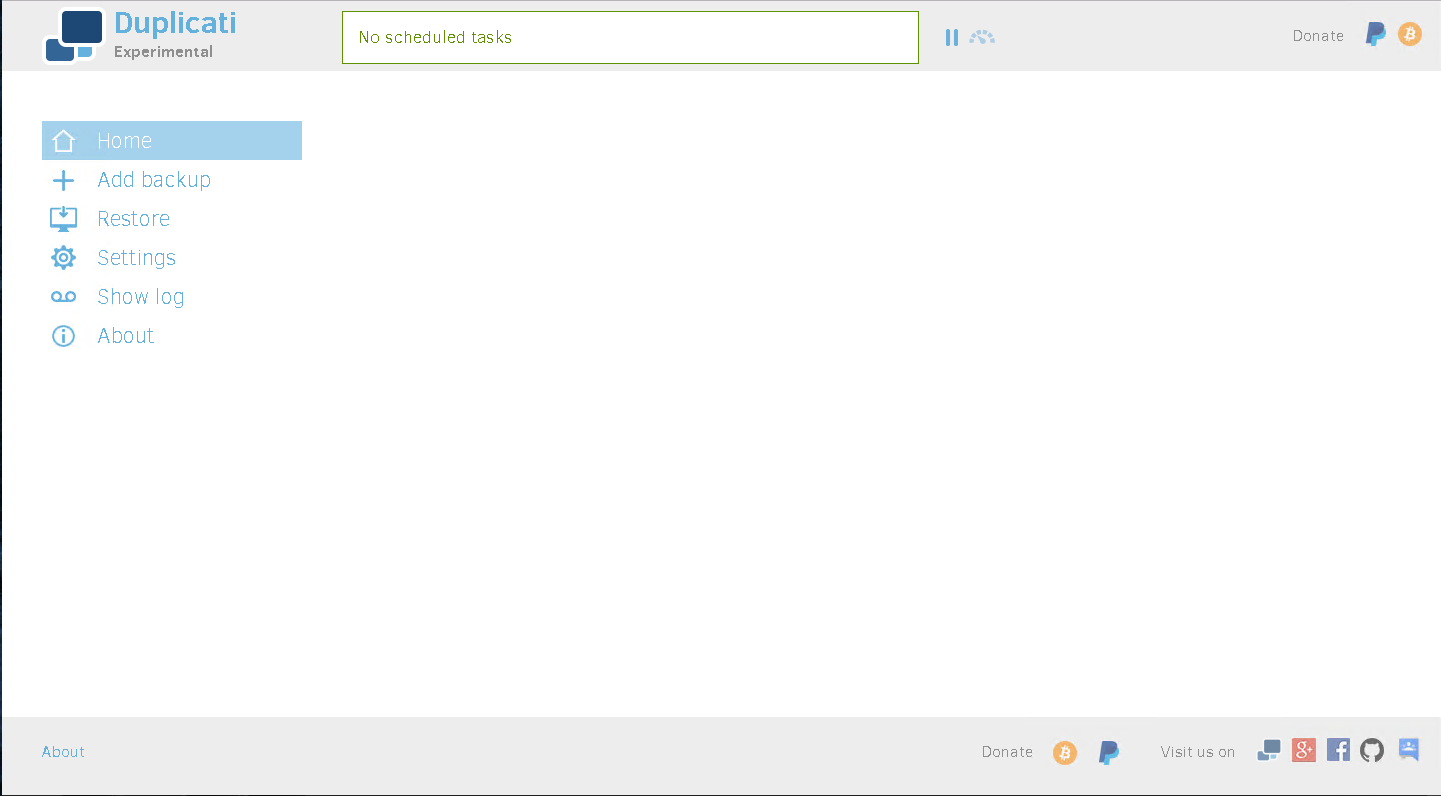
Duplicati
General Configuration
Select Add Backup from the backups control folio. This volition bring us to the folio shown below:
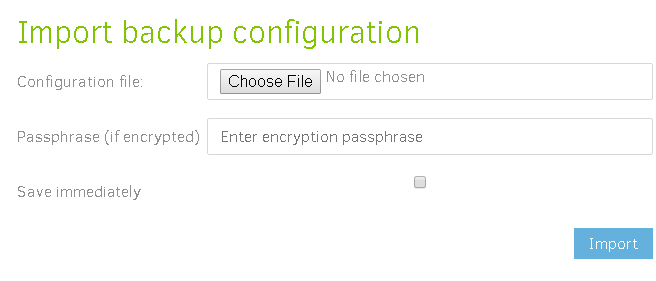
Import Configuration
Nosotros'll be clicking on the Choose File button. A new Windows Explorer window will open up. Paste the Config URL from the ticket into the File Name field and and then select Open up. Give it a moment or two to pull in the data. It shows as completed when the Windows Explorer windows close and the No File Chosen changes to config.php or something similar.
At this point, you'll click Import then Side by side to bring up the next page. For your reference, an case image of the Config link from the first epitome has been included below:

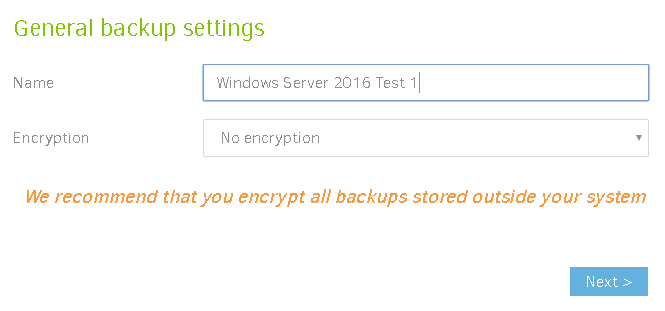
The next page you lot'll encounter is Full general Backup Settings, and this where you can give your backup a name. This is the name the backup will run under each time information technology runs and what you lot'll come across when yous need to restore your files. The image below shows the field filled in for a Windows Server, so you lot would likely choose something different for your Linux installation. Merely it gives you the thought. The name pick is completely yours. Later on y'all've entered a name in the field, click Next to motility forrad with the configuration.
Settings
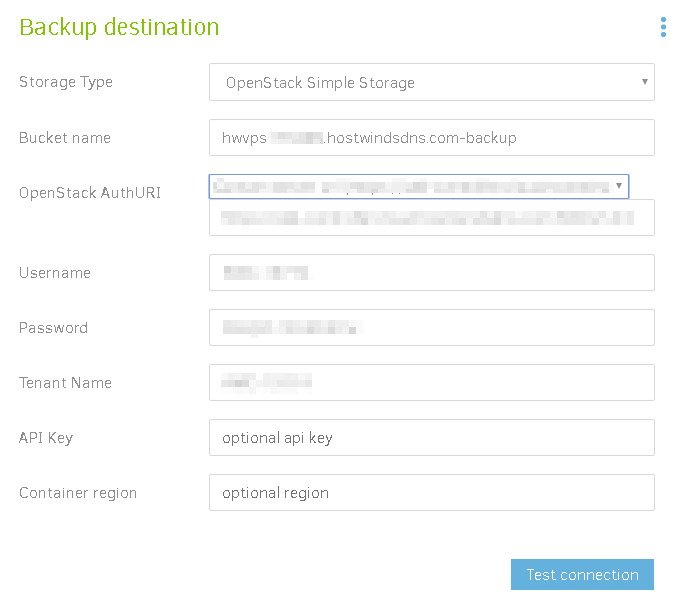
The side by side page is the Backup Destination page (shown in the image beneath). The only thing you demand to exercise here is changing the Open up Stack Auth URL field. This is washed using the drib-down menu, where you lot'll select the Custom Server URL. Choose the data centre that your server resides in.
The image below shows a Dallas setup. After choosing the server to support to the drop-down menu, you'll click the Examination Connection button. A window should pop up request if you wish to create a folder with your server's hostname. Select yep. Some other window will appear stating the connection worked. Click OK and and so Side by side at the lesser of the page.
The next folio y'all'll come to is Source Information. Your choices here should default to / which would be backing up the entire server. This is the best option in most Linux machines, every bit various configurations and shared object files are stored all beyond the motorcar. Yous can choose to be more than selective in what you fill-in but keep in mind this will limit what you lot can restore. If you choose to stick with the default, click next and motion on to the Schedule page (shown below):
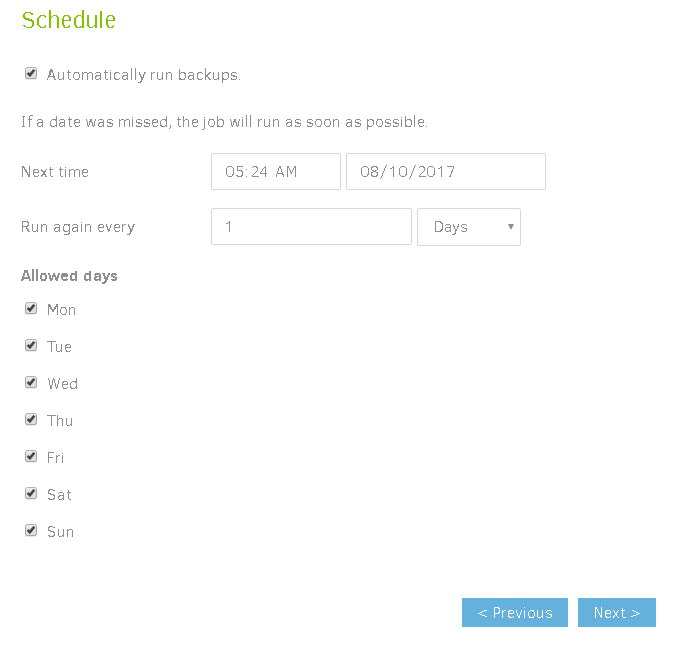
Schedule
This page gives you the option of selecting exactly what time and what days your backups will run. Please note that the amount of data stored affects your storage charges. So these choices will affect your monthly pricing. We recommend taking frequent backups and taking a backup earlier any major changes. We also recommend regularly checking in to ensure your fill-in is completed without error.
Afterward selecting the days and time for your backups, you can click next and move to the last Options screen.
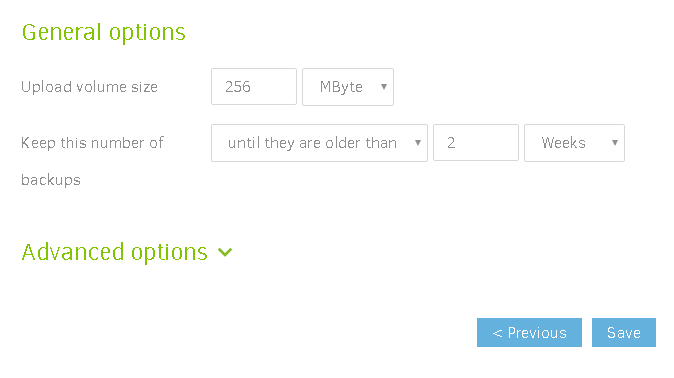
General Options
Decision
This final page of the setup lets you choose how long to store your backups. You may modify the default storage fourth dimension, which is currently set up to ii weeks. We recommend that the upload volume size should be left gear up to default. Once you lot've fabricated your choices click Salvage, which will open a Window to start your first fill-in run. Select Continue Without Encryption. You'll run across the backup offset to run in a progress bar at the top of the screen.
If you lot have any questions about a specific step of this process or require assistance, delight contact us. Yous may reach united states via Live Conversation or a ticket to Support so we can assist you.
Source: https://www.hostwinds.com/tutorials/configuring-duplicati-backups-linux
0 Response to "what to use for upload volume size for duplicati"
Post a Comment